


Performance Tuning for Track Days: The Complete Guide
Last Updated: November 10, 2026
Quick Summary
Performance tuning for track days is the coordinated calibration of engine, brakes, suspension, tires, and cooling so a car survives repeated high-load laps, not just one heroic pull. Tune the whole package with data backing each change, starting with brakes, tires, and fluids before adding power.
- Flush brake fluid with high-temp track-rated fluid and keep at least half pad life on a track compound.
- Set cold tire pressures, then adjust toward a hot target after each session.
- A track tune often runs less aggressive at the top end, gaining from mid-range torque and consistency.
- Set corner balance and ride height first, then alignment, damping, and tire pressures last.
- Change one variable per session and compare lap times and tire temperatures before the next change.
Table of Contents
- Why Track-Day Performance Tuning Is a System, Not a Single Upgrade
- The Track Day Car Preparation Checklist
- ECU Tuning for Track Days: Calibrating for Sustained Load
- How to Avoid Engine Knock Under Repeated High-Load Driving
- Track Day Suspension Tuning: Setup Before Lap Time
- Cooling, Reliability, and the Trade-Offs Nobody Mentions
- A Prioritized Tuning Plan by Budget and Driver Experience
- Book Your Dyno Session and Build the Baseline
- Frequently Asked Questions
Why Track-Day Performance Tuning Is a System, Not a Single Upgrade
Performance tuning for track days is the coordinated calibration of engine, brakes, suspension, tires, and cooling so a car survives repeated high-load laps, not just one heroic pull.
Every gain has a partner cost: add power and you add heat; stiffen the suspension and you change how the tires load.
Below is the full sequence, from pre-event inspection to ECU calibration to the setup order that produces lap time.
The Track Day Car Preparation Checklist
A track day car is only as good as its weakest system on lap ten, so preparation starts with inspection, not shopping. Run this checklist before every event and log the results.
- Brake fluid flushed within the last few months, with a high-temp fluid rated for track use
- Pad thickness measured, with at least half life remaining on a track compound
- Rotors checked for cracks, glazing, and minimum thickness
The track day safety and technical requirements published by the Sports Car Club of America give you a solid baseline for what organizers inspect, but each event's own rulebook governs.
Brakes, Tires, and Fluids Before You Touch Power
Brakes and tires decide whether you finish the day. Stock pads fade within a few hard laps, and faded brakes turn a fast lap into a scary one.
Tires come next. A performance tire with the right cold pressure and a proper alignment will outlap a car with more power on all-seasons every time. Set cold pressures, note them, then adjust toward a hot target after a session.
ECU Tuning for Track Days: Calibrating for Sustained Load
ECU tuning for track days is the process of recalibrating fuel, timing, boost, and safety limits so the engine makes consistent power across twenty minutes of full-throttle laps rather than one dyno pull.
Heat is cumulative. A calibration that's safe on a single pull can push intake air and coolant temps into territory where the ECU pulls timing, less power and more exhaust heat.
Street Tune vs. Track Tune: What Actually Changes
A street tune prioritizes smooth throttle response, fuel economy, and emissions compliance at part throttle. A track tune shifts the safety margins: richer mixtures under load, conservative timing in high-heat zones, and boost targets that hold steady instead of spiking.
The track tune isn't just "more aggressive." It's often less aggressive at the top end to protect the engine, with gains coming from better mid-range torque and more consistent delivery.
How to Avoid Engine Knock Under Repeated High-Load Driving
Knock under sustained load is prevented by controlling heat, fuel quality, and timing together, and by logging the data that tells you when any of the three is drifting.
Three things cause it on track: heat soak (intake air temps climb, the charge gets less dense, and the ECU compensates); fuel supply (a tired pump or restrictive line drops pressure at the worst moment); and timing that was safe on the street becoming too advanced once ambient temperature and sustained load stack up.
Fuel, Timing, and the Data You Need to Log
Log these every session: knock feedback or knock count, fuel pressure, oil pressure, intake air temperature, coolant temperature, and wideband air-fuel ratio. A dedicated gauge makes fuel and oil pressure readable in real time instead of buried in a log file, we stock an AEM 52mm pressure gauge for exactly this job.
For cars chasing more fuel under sustained load, a higher-capacity pump is the usual fix; the AEM 380lph high-pressure fuel pump supports the calibration rather than fighting it.
Track Day Suspension Tuning: Setup Before Lap Time
Track day suspension tuning is the process of setting ride height, spring preload, damping, alignment, and tire pressure as one connected system so the tire contact patch stays loaded through cornering, braking, and acceleration.
Start with corner balance and ride height, then alignment, then damping, then tire pressures last. Each step changes the others, so sequence saves hours of frustration.
Sag, Damping, and Tire Pressure as One System
Sag is how much the suspension compresses under the car's weight, and it sets your starting point. Too much and you're on the bump stops in compression; too little and the car skates over bumps.
Tire pressure is the tuning knob most drivers touch first and understand last. Set cold pressures, run a session, then measure hot pressures immediately in the pits.
Diagnosing Handling Symptoms Instead of Guessing
Most handling complaints fall into a small set of repeatable patterns, and each points to a specific adjustment before you touch a wrench. Use the symptom first, then confirm with tire temperatures and pressures.
- Mid-corner push (understeer): front tires are over-inflated or the front is rolling onto the outside shoulder. Check hot front pressures and front tire temperatures across the tread; if the outer edge is much hotter, add negative camber or reduce front pressure a couple of psi before changing spring rates.
- Corner-exit oversteer: rear rebound is too stiff or rear tire pressures are too high, so the rear loses grip as weight transfers. Soften rear rebound one or two clicks and re-check hot rear pressures.
- Entry instability under braking: too much front rebound or too little front compression lets weight transfer too quickly. Adjust one click at a time and log the change.
Watch out: changing two adjustments between sessions makes it impossible to know which one helped. Change one variable, run a session, and compare lap times and tire temperatures before the next change.
Vehicle-Specific Setup Differences
There is no universal track setup; recommendations shift with drivetrain, weight, power, tire type, and track layout.
- Drivetrain: all-wheel-drive cars tend to understeer at the limit and respond well to a slightly stiffer rear bar to rotate; rear-wheel-drive cars are more sensitive to rear rebound and throttle-induced oversteer; front-wheel-drive cars benefit from rear stiffness and careful front camber to fight push.
- Weight and power: a heavier car needs more spring rate and more brake and cooling margin, while a high-power car needs more rear grip and conservative rear alignment to put power down without spinning.
- Tire type: a street performance tire wants lower hot pressures and less aggressive camber than a track compound, which can tolerate more negative camber and higher hot pressures.
The Session-to-Session Data Loop
Before you change anything, record a baseline: cold and hot tire pressures at all four corners, tire temperatures across the tread, alignment, ride height, damper settings, and lap times from a consistent session. Then change one variable, run another session under similar conditions, and compare. Changing one variable at a time across a few sessions makes the effect of each change easier to read.
Cooling, Reliability, and the Trade-Offs Nobody Mentions
Cooling is where track builds quietly fail. A car that runs fine on the street can overheat on lap eight because the cooling system was never sized for sustained load. Radiator capacity, airflow through the core, oil temperature, and transmission temperature all matter, and each upgrade has a trade-off.
Why Heat Is Cumulative on Track
On the street, airflow and short duty cycles keep temperatures in check. On track, you spend most of the lap at high load with limited airflow, so heat goes in faster than it comes out. Coolant, oil, and intake air temperatures all climb; hot intake air is less dense, so the ECU pulls timing and a car that felt strong on lap two feels flat on lap ten.
The Reliability Upgrades and What They Actually Buy You
- Radiator and airflow: a larger core and better ducting buy margin, but they add weight and drag. Sealing the radiator to the bumper opening so air goes through the core instead of around it is often the cheapest gain.
- Silicone hoses: silicone holds up better than aging rubber under heat cycling. The Browns Performance high-pressure silicone radiator hose kit for the 02-07 Impreza WRX/STI is a straightforward reliability upgrade for that platform.
- Timing belt guide: a timing belt guide is cheap insurance against belt walk under high load.
Reliability parts protect the power you already have rather than adding horsepower.


The Trade-Off Math Nobody Writes Down
Every reliability upgrade costs something: a bigger radiator adds weight and drag, a stiffer suspension costs ride comfort, a more aggressive tune costs margin. Compare the cost of the part against the cost of the failure it prevents and its lap-time effect. A cooling upgrade that prevents a costly failure can justify its cost; a cosmetic aero piece that adds drag without downforce may not.
Troubleshooting Heat and Reliability During and After Sessions
- Coolant temperature climbing session after session: check coolant level and condition, confirm the fan is working, look for a blocked or dirty radiator core, and verify the radiator is sealed to the bumper opening. If it still climbs, the system is undersized for the load.
- Oil temperature high with falling oil pressure: stop pushing and let the car cool; check oil level and condition, and consider an oil cooler before the next event.
- Brake fade or a long pedal: fluid is boiling or pads are past their temperature range. Bleed with high-temp fluid and check pad thickness before the next session.
Watch out: a car that only overheats in the last five minutes of a session has no cooling margin left, and the next step is usually a mechanical failure rather than a lap-time loss.
A Prioritized Tuning Plan by Budget and Driver Experience
The right upgrade order depends on your budget and seat time, not on what looks good in a build thread.
| Priority | Upgrade | Best For | Why It Comes First |
|---|---|---|---|
| 1 | Brake pads, fluid, tires | Every driver | Safety and consistency before speed |
| 2 | Pre-event inspection and logging | Every driver | Data before decisions |
| 3 | Cooling and reliability parts | Cars seeing repeated sessions | Protects the engine under load |
| 4 | Suspension setup and alignment | Drivers with 3+ events | Setup unlocks existing grip |
| 5 | ECU calibration | Modified cars with supporting parts | Power only after the chassis and cooling are ready |
Beginner: brakes, tires, fluids, and a full inspection.
Intermediate: add suspension setup, alignment, and a track-focused calibration if you've added supporting parts. This is where most drivers find their biggest lap-time gains.
Advanced: standalone ECU strategies, custom calibration, and aero.
Book Your Dyno Session and Build the Baseline
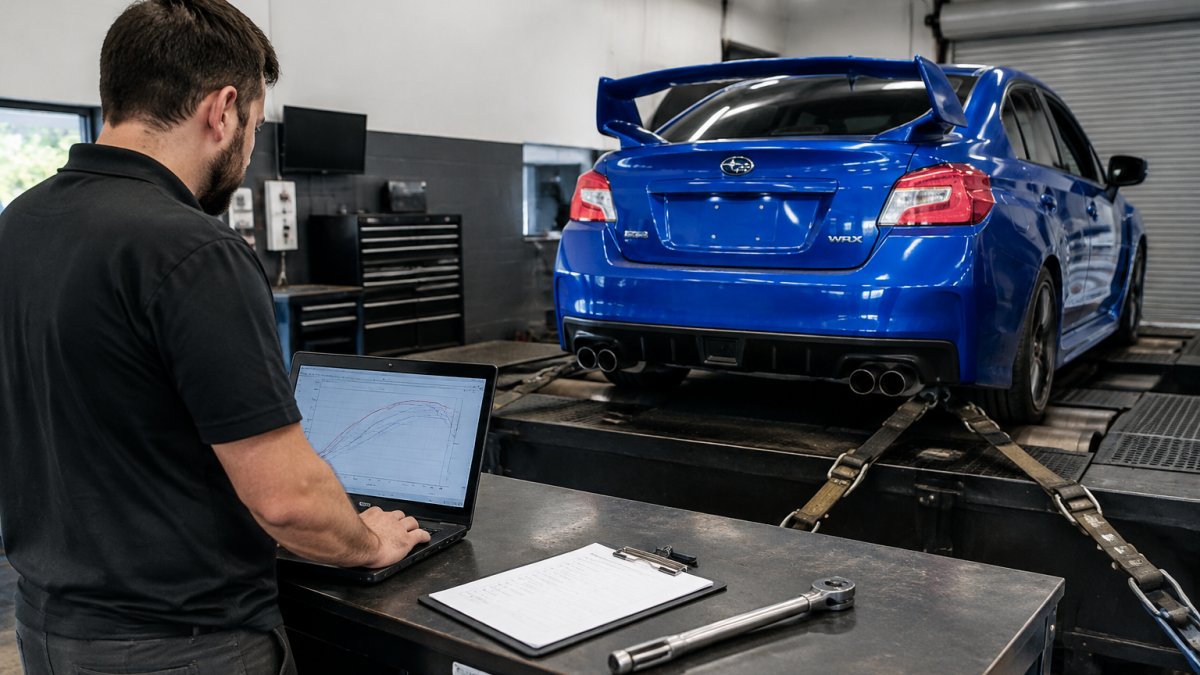
Measuring is one way to stop guessing. A baseline dyno session can show what your car makes and how it behaves under load before you spend more on parts. Data first, parts second.
If your build has outgrown off-the-shelf maps, or you're seeing fuel trim numbers that don't add up, that's the point where a proper calibration session is worth booking. Taylor'd Tuning offers track-proven AWD dyno and hub dyno tuning on Subaru, GTR, Mustang, and GM platforms, with support for HP Tuners, Cobb, ECUTEK, Motec, and Haltech. Dyno tuning and calibration sessions start at $850, and a $150 non-refundable deposit holds your appointment and comes off the total.

Get started with Taylor'd Tuning and turn your next track day into a measured, repeatable baseline.
Frequently Asked Questions
How much does a performance tune usually cost?
At Taylor'd Tuning, dyno tuning and calibration sessions start at $850, and every dyno or remote tuning session carries a $350 minimum once work begins, regardless of outcome. A $150 non-refundable deposit books the appointment and comes off the total; it also allows one reschedule before a second deposit is required. Prices do not include ECU software licenses, credits, or flashpoints, and injector changes may add fees. Budget for supporting parts separately.
Is ECU tuning illegal?
It depends on what the tune does. Taylor'd Tuning cannot tune to accommodate modifications that delete factory emissions equipment on any vehicle, and doing so may trigger a check engine light. Tuning and other modifications are intended for off-road racing use only. Before any track event, check the sanctioning body's rulebook for your class, since some series restrict calibration changes. Keep emissions equipment intact and confirm class legality before you book a session.
How do you avoid engine knock after tuning a car?
Knock usually comes from too much timing, too little fuel, or heat soak. Log knock feedback, fuel trims, and intake air temperature on every session, and have the calibration adjusted rather than adding boost to chase a number. Run the fuel octane the tune was written for, keep the cooling system healthy, and shorten sessions when ambient temperature climbs. If you see knock activity on the dyno or the street, stop and diagnose before the next track day.
Should you tune your suspension before or after an ECU tune?
Baseline first, then power. A stock or worn suspension masks what the engine is doing, and adding horsepower to a car that rolls and dives makes lap times harder to read. Get the car safe and consistent: brakes, tires, alignment, and a suspension setup you can repeat. Then add ECU tuning and measure the change against your baseline. On a tight budget, suspension and brakes usually return more usable lap time per dollar than another 30 horsepower.
What is the difference between Stage 1, Stage 2, and Stage 3 tuning?
Stage numbers are shorthand, not standards. Stage 1 typically means a calibration on an otherwise stock car. Stage 2 usually pairs a tune with bolt-ons like an intake or downpipe. Stage 3 generally involves hardware changes such as a larger turbo or fueling upgrades. What matters at the track is whether the calibration matches the parts and the load the car sees. Ask for a tune built around your actual modification list, not a label.
What engine temperatures and pressures should you monitor during a track day?
Watch coolant temperature, oil temperature, oil pressure, intake air temperature, and fuel pressure, and know your car's normal values before you go. A wideband gauge such as the AEM X Series, $215.99 at Taylor'd Tuning, gives you live air-fuel ratio data. Log the same channels every session so you can compare. If oil temperature or intake air temperature climbs session after session, shorten runs and address cooling before adding more boost.
